Winter
Winter is the season for snow and melty marshmallows afloat in hot cocoa!
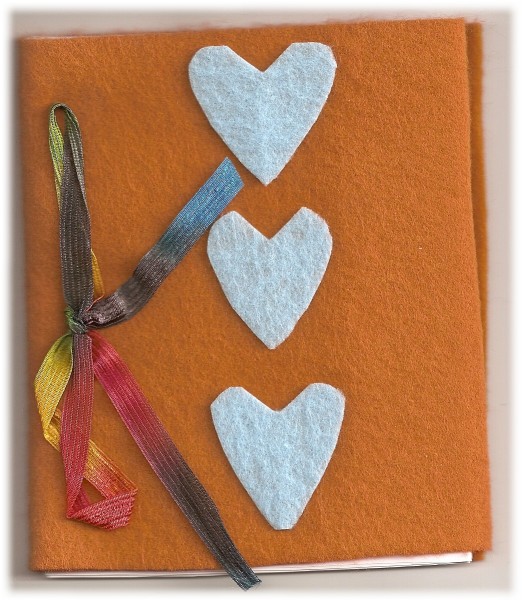
February brings snow, ice, and Valentine’s Day. Instead of the traditional chocolates, try giving your sweethearts a story, too. Make a nice cover for the picture book and tuck your own message inside it.
FOLK ART FELT BOOK COVER
Supplies:
- Copy of A Valentine for Mrs. Fenwick in your size choice
- Felt piece which extends beyond the edges of the printed story book by at least a quarter of an inch.
- Colored yarn strand at least eight inches long and a tapestry needle
- Hole punch
- Scissors
- Ruler
Instructions:
- Print a copy of the story book in whatever size you desire and assemble it as you want it to be bound.
- Punch two holes a half inch apart on the binding edge of each page of the book. Make sure the pages line up together.
- Cut the felt to fit as a cover for the book when the felt is folded over it. Insert the assembled pages.
- Thread the yarn through the tapestry needle and sew it through the felt and through the holes in the pages. Tie the yarn into a bow to secure the cover to the book pages.
Winter is the season for snow and melty marshmallows afloat in hot cocoa!
This holiday time try out a historical theme for the season. Decorate your home with pineapples, red apples polished to a glow, and ivy. Pineapples represent hospitality and were a staple of the Colonial American Winter home. Candles lent their warm glow in windows to light the way for carol singers and holiday travellers. Folk art has its place in Winter holiday traditions as much as any other. Try your hand at the felt rug project. Make a charming ornament for your tree or to dress up a gift. And remember to consider selecting gifts from the numerous charitable organizations this season if you are inclined to exchange presents. Local museum shops and historical sites can be great sources for little items to tuck into stockings or even into treat bags destined for distribution at your child’s school party. Tuck a brochure from the museum or historical site into the bag to remind parents that there are fun places to visit close to home! It is a great way to support local places of interest in your own area. If you want to try your hand at the above crafts, check out the instructions below. Just click the highlighted word in each set of instructions to be directed to a download of printable graphics related to each respective project:
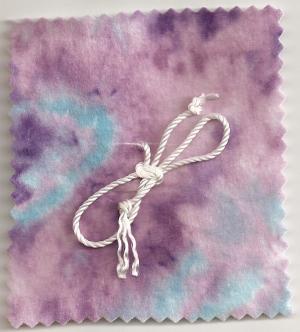
FOLK ART FELT RUG
Supplies:
- 2 ft. by 4 ft. of white felt per rug
- 6 colored felt squares (4 to 6 inches in size) per rug
- 1 skein colored yarn
- Yarn
- Scissors
- Ruler
Instructions:
- If you want to fringe the rug, then cut 3 inch deep and 1⁄4 inch spaced apart slits in both ends of the rug. Meaning the ends that are 2 feet in width.
- Take the six felt squares and lay out the design on the rug. Pin the squares onto the rug in the desired positions. Cut two one inch slits in the center of both the felt square and through the rug itself where the square will be adhered. The slits should be 1⁄4 inch apart.
- Cut one six inch strand of yarn per felt square and thread it through the slits in the square and rug. Bring both ends of the yarn together and tie a bow. The square should now look like a merry package.
- While there is no need to sew the squares onto the rug, a few dots of fabric glue applied to the underside of the felt squares may aid in securing them to the rug.
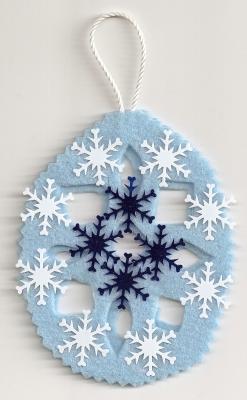
ORNAMENTS
Supplies:
- Cookie cutters
- Felt squares in a variety of colors
- Sequins in a variety of sizes, shapes, and colors
- Fabric glue
- A skein of yarn
- Scissors
- Black fabric marker
Instructions:
- Trace around a cookie cutter to duplicate the design onto the felt square. Cut out the design. Repeat and match the pieces front and back.
- Layout a design using the sequins on the cut felt design. Adhere the sequins to the felt with glue. Set aside to dry completely.
- Cut a 3 inch strand of yarn. Create a loop. Place the ends of the loop between the top two ends of the felt pieces placed back to back. Decorated surfaces should be visible. Secure the ends of the yarn tucked inside the felt pieces with glue.
- Place dots of glue along the inside surface of one of the felt pieces and press the two pieces together to secure. Set aside to dry.
- Use the finished ornament as a decoration for the tree or for a pretty package!
NAUGHTY OR NICE POSTER

Supplies:
- Santa Claus sticker page
- Poster text page
- Green poster board
- Scissors (regular and decorative edged)
- Glue
- 6 Small boxes with lids
- Holiday gift wrap and curling ribbon (variety)
- Parchment paper (or regular unlined paper)
- Black marker
- Bowl of candies
Instructions:
1. Print out Santa Claus sticker page and poster text. Cut out the Santa image. Cut out the text for the poster.
Set aside.
2. Adhere the Santa Claus sticker page image to the center of the poster. Adhere the poster text at the top of the
poster.
3. Remove the lids from the four boxes. Wrap the tops of the boxes first with holiday paper and secure with glue or
tape. Wrap the bottom portion of the boxes and secure with tape or glue. Secure a bow of curling ribbon on the lid
of each box. Make sure the lids still come off the boxes easily when they are reassembled.
4. Once boxes are papered, adhere the underside of the bottom of each box onto the poster. Arrange the boxes in a ring
around the Santa image or vertically on either side of him. Allow to dry.
5. Fold one sheet of parchment paper into six sections. Cut out the sections. Write “Naughty” on three sections.
Write “Nice” on three sections.
6. Fold the “Naughty” and “Nice” sections to fit inside the boxes. Tuck one section into each box at random.
7. Place the finished poster over a table holding a bowl of treats for those daring enough to test where they stand on
Santa’s famous Naughty or Nice list.
Halloween is the night when the moon shines bright on costumed revelers in the mood for a fright!
The man-in-the-moon has seen his rosey-cheeked visage adorn grandfather clocks in nurseries and been featured in childhood stories and games since he smiled down upon the first man who needed a friendly guide to lead him through the dark of night. Who better to light the way for trick-or-treaters as they wind their way from house to house on All Hallow’s Eve?
Using the man-in-the-moon as a theme, try the following for a new twist on an old favorite. For those with mullioned windows, there is an easy, dramatic way to transform your home into a haunted cottage. Just click the highlighted word in each set of instructions to be directed to a download of printable graphics related to each respective project:
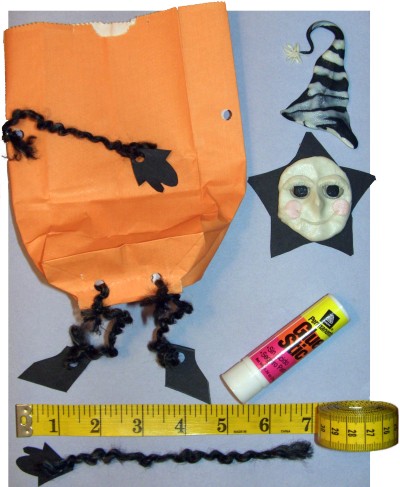
TREAT BAGS
Supplies:
- Small paper sacks
- Stickers download (size the stickers to fit the bag you’ve chosen)
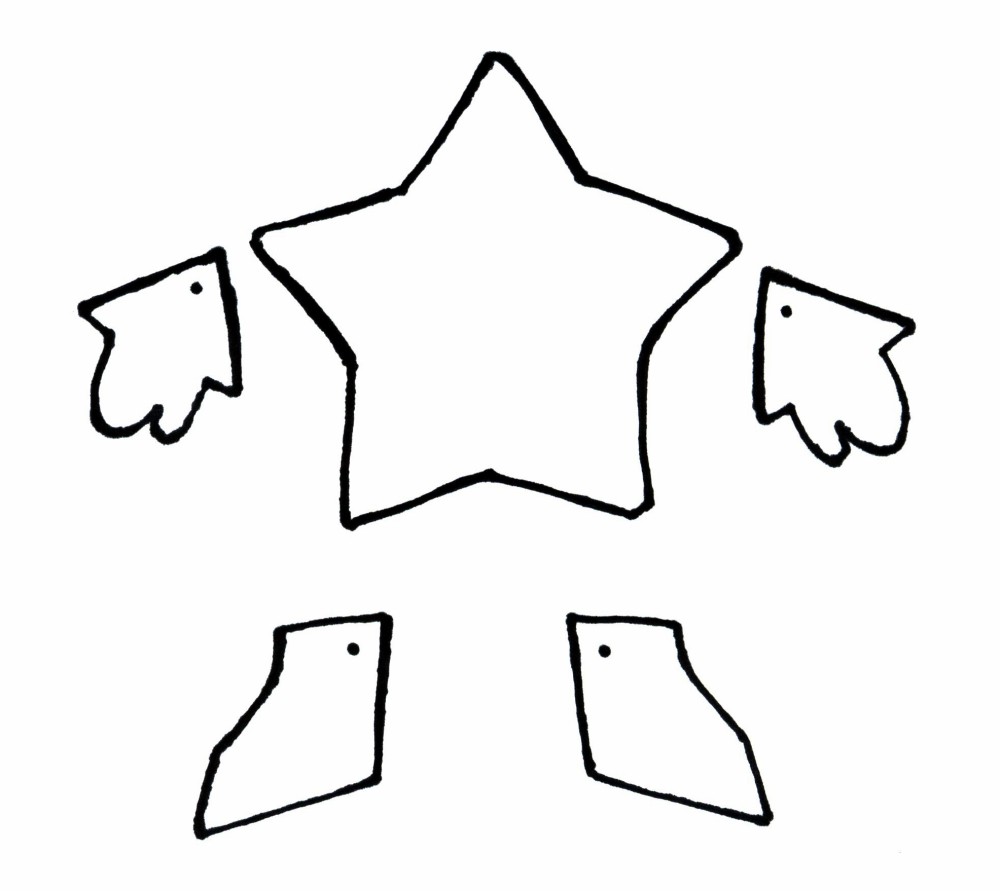
- Hands and feet template download (size them to fit the bag you’ve chosen)
- Colored construction paper or posterboard
- Yarn
- Scissors
- Ruler
- Sticker paper designed for computer OR regular computer paper and double-sided tape
Instructions:
- Decide how big you want the image to be on the front of the bag. Size the image on your computer and then print out the sticker page as directed on the computer sticker paper OR print on regular computer paper. Cut out the stickers. If you chose to use regular computer paper, use the double-sided tape to adhere the stickers to the bag.
- Size the hands and feet template to fit the bag. Print out the template and cut out the images. Trace the images onto colored paper or posterboard. Make as many pairs as needed for the number of bags you intend to create. Punch a single hole in the top of each hand and foot through which you will knot a strand of yarn.
- For the arm, the yarn should be long enough that the hand will touch the bottom of the bag once the other end of the yarn is attached to the bag. Attach the hand to one end of the yarn. Reach inside the bag and push the inner flaps of one side outward. Pinch the sides together and punch a hole through them. Thread the remaining end of the yarn through the hole in the bag and tie a knot. Repeat the process for the other side of the bag so you have both a left and right arm.
- For the leg, the yarn should be long enough to hang several inches below the bottom of the bag once the bag is resting upright. Once you have the desired length of yarn with the foot attached to one end, turn the bag upside down. Pinch the bottom of the bag into two halves protuding outside the bag. With the fold toward you, punch a hole through the halves. You will need to space the legs about 1 1⁄2 inches apart if you are using a 4 inch bag. Be careful not to punch the hole too close to the outer edges of the bag. Thread the remaining end of the yarn through the holes in the bottom of the bag. Repeat the process for each leg till you have both a left and a right one.
- Fill the bag with treats and small toys.
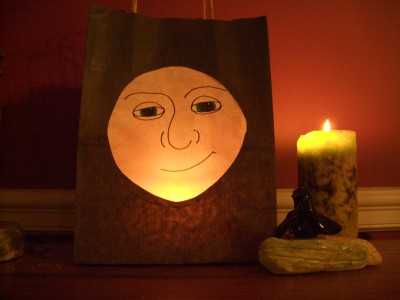
LUMINARIES
Supplies:
- Sacks or totes (size the templates to fit the bag you’ve chosen)
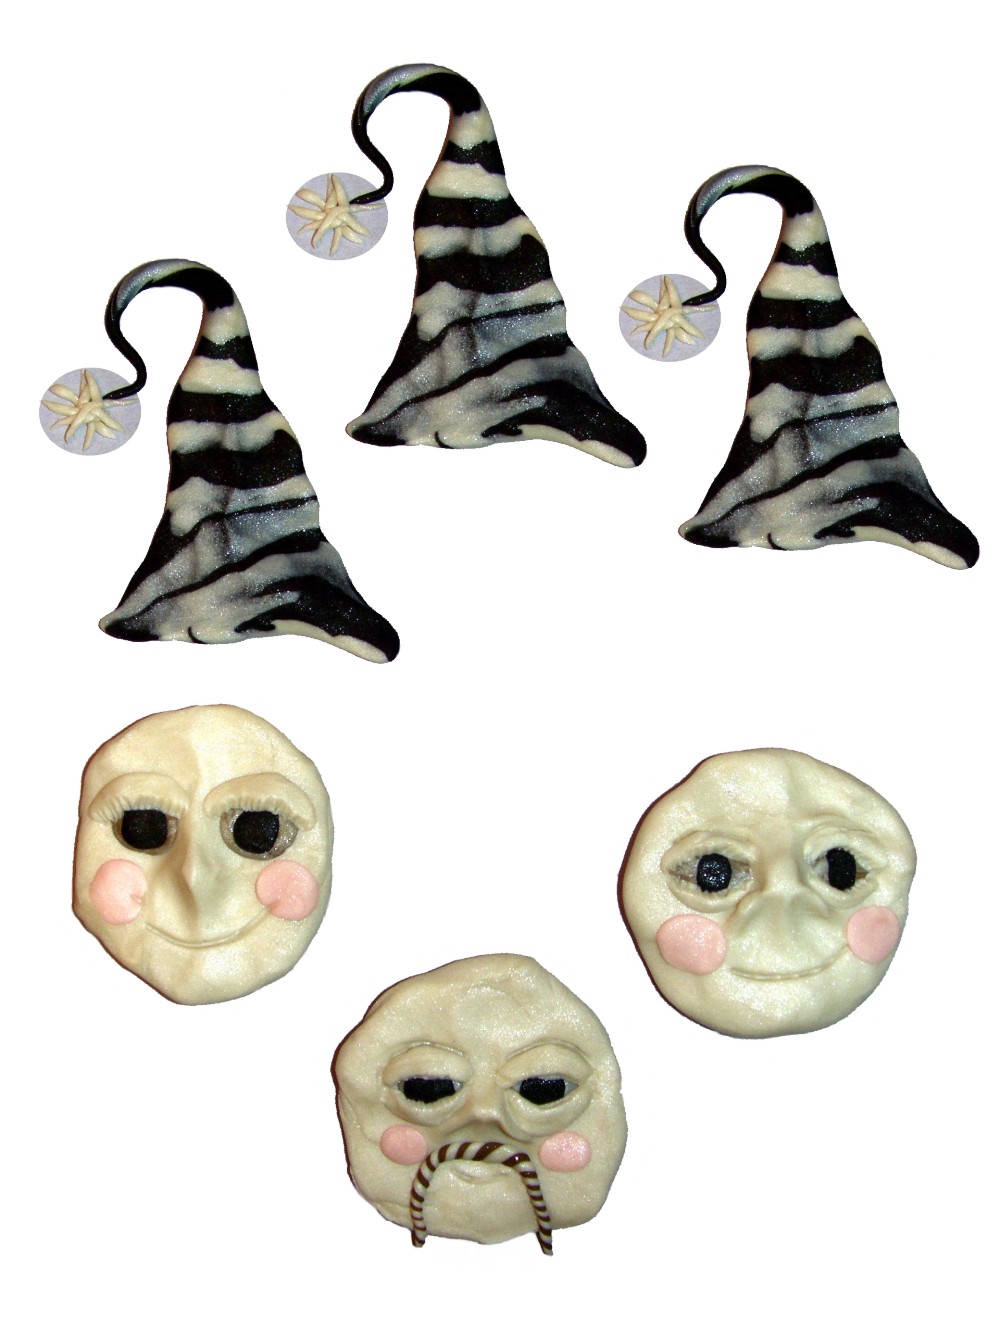
- Moon face template
- White tissue paper
- Markers
- Rose-hued powder blush
- Double-sided tape
- Scissors
- Votive candles in protective glass holders (Never leave burning candles unattended and please only use luminaries
- outdoors away from flammable objects!)
- Sand (to line the bottom of the bags and keep them stationary)
Instructions:
- Size the template moon face to fit the size bag you’ve chosen. The face should take up most of the front of the bag for the best lit effect.
- Trace the template face onto the white tissue paper making as many copies as you have bags. Using a black marker will make the image most visible once backlit. Color the iris any color you wish. Give the moon a cheeky glow by swirling its cheeks with the blush.
- Measure the moon face and cut a circle from the front of the bag that is slightly smaller than the dimensions of the face. Then, cut the tissue paper to fit the entire front interior of the bag through which the face will be visible. It is easier to secure the face to the bag if the tissue paper covers the entire interior face of the bag.
- Use the luminaries to light a path but keep them well away from where people will be walking to prevent contact with the costumes which if homemade may not be flame retardant. A nest of sand lining the bottom of the bag will hold it open to provide the most secure place for the votive candle in its holder. Don’t forget to make a wish before blowing out all those flickering lights at evening’s end. Halloween wishes are potent!
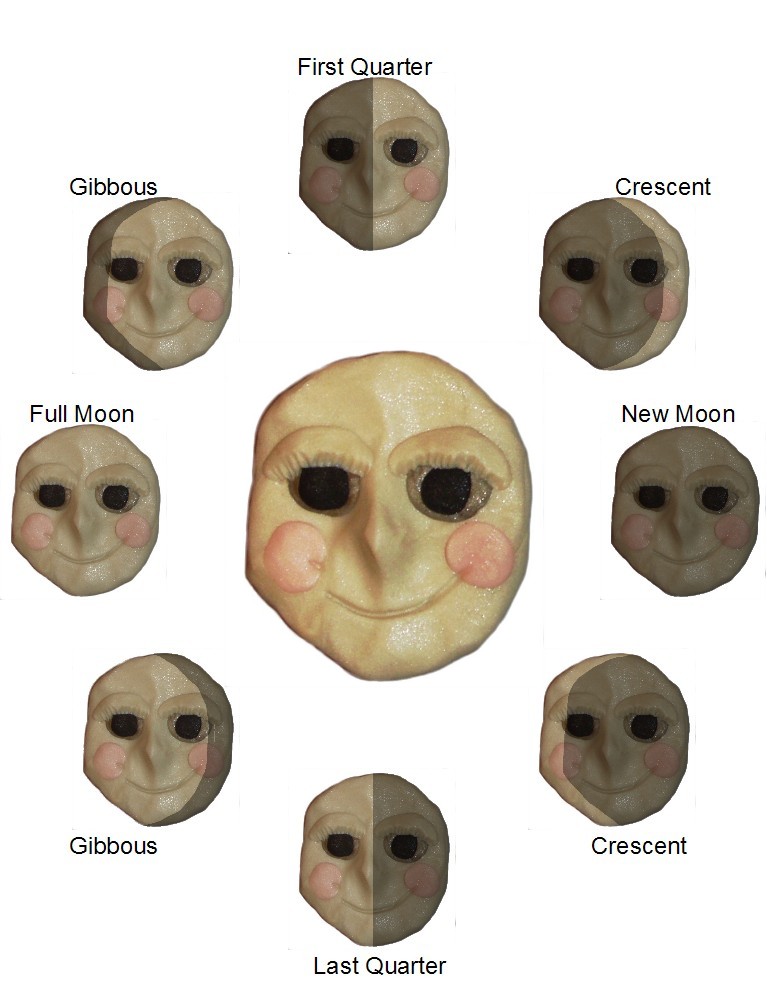
PHASES OF THE MOON FORTUNE TELLER POSTER

Supplies:
- Moon phases sticker page
- Poster text page
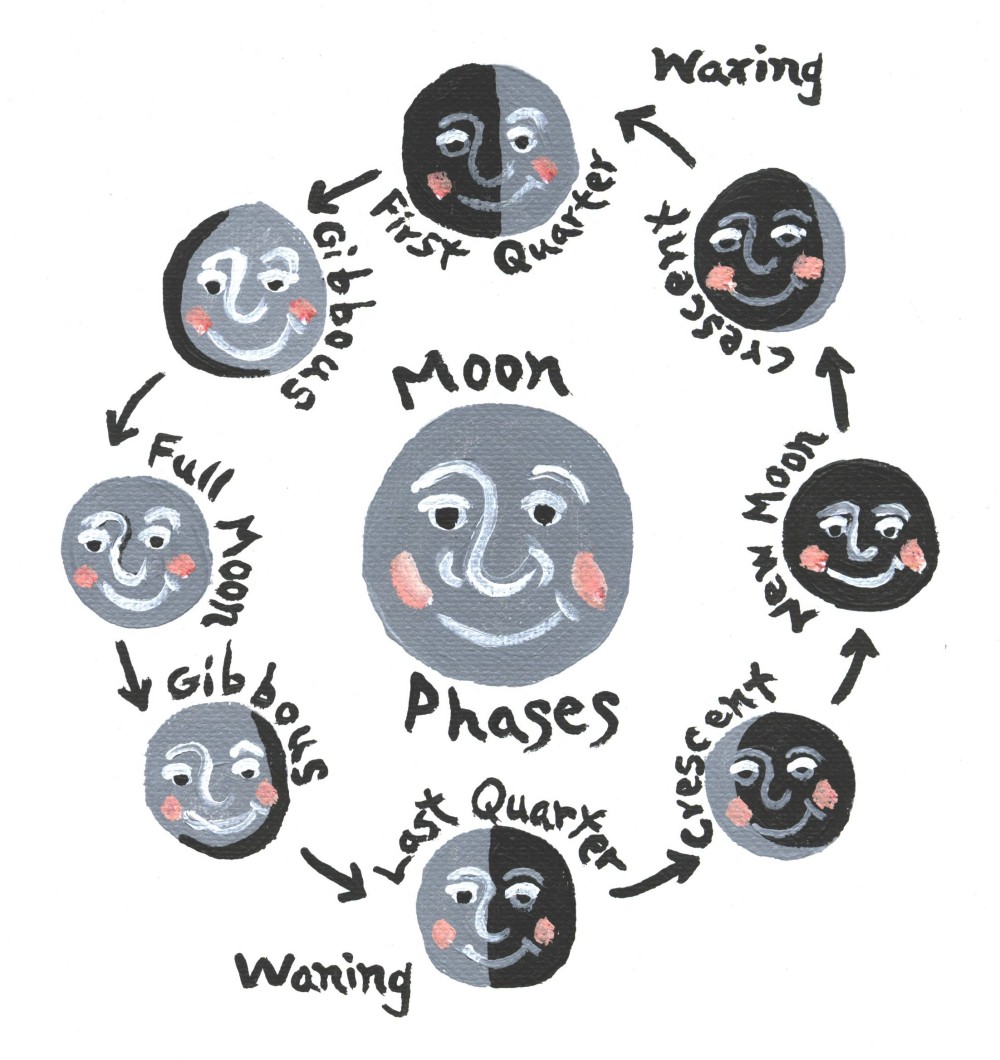
- Moon phases chart
- Black poster board
- Scissors (regular and decorative edged)
- Glue
- Small boxes with lids
- Silver or gold acrylic paint (small paint brush, water tray, paper towels, protected painting surface)
Instructions:
- Print out moon phase stickers, moon phases chart, and poster text. Cut out the moon stickers making sure to leave their respective labels intact. Cut out the text for the boxes and poster directions. Set aside.
- Adhere the moon phases to the poster according to their placement on the moon phases chart.
- Remove the lids from the four boxes. Paint the tops of the boxes first and set aside to dry. Paint the exterior sides of the boxes and set aside. Once the lids are dry, paint the sides of the lids. Allow to dry completely before attaching to the poster.
- Once boxes are dry, adhere the text labels to the inside bottoms of the boxes (one for each box).
- Place the boxes around the phases of the moon in a diamond pattern in which each box forms a corner of the diamond. Glue the bottom of the boxes into position and replace the lids to hide the text within them.
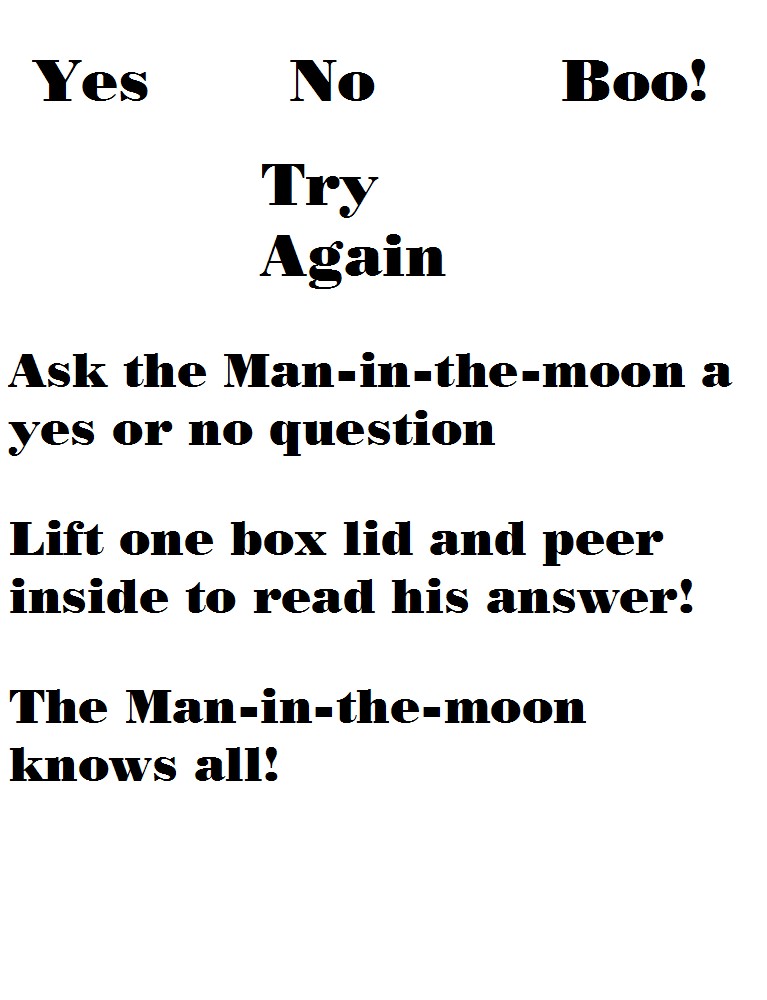
- On one side the poster glue the text, “Ask the man-in-the-moon a yes or no question.” On the other side of the poster glue the text, “Lift one box lid and peer inside to read his answer.” At the top of the poster, adhere the text, “The Man-In-The-Moon Knows All.”
- Place the finished poster over a table holding a bowl of treats for those daring enough to test their fortunes against the wisdom of the man-in-the-moon.
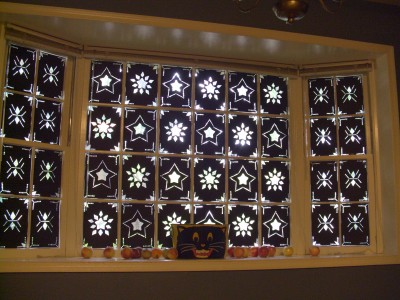
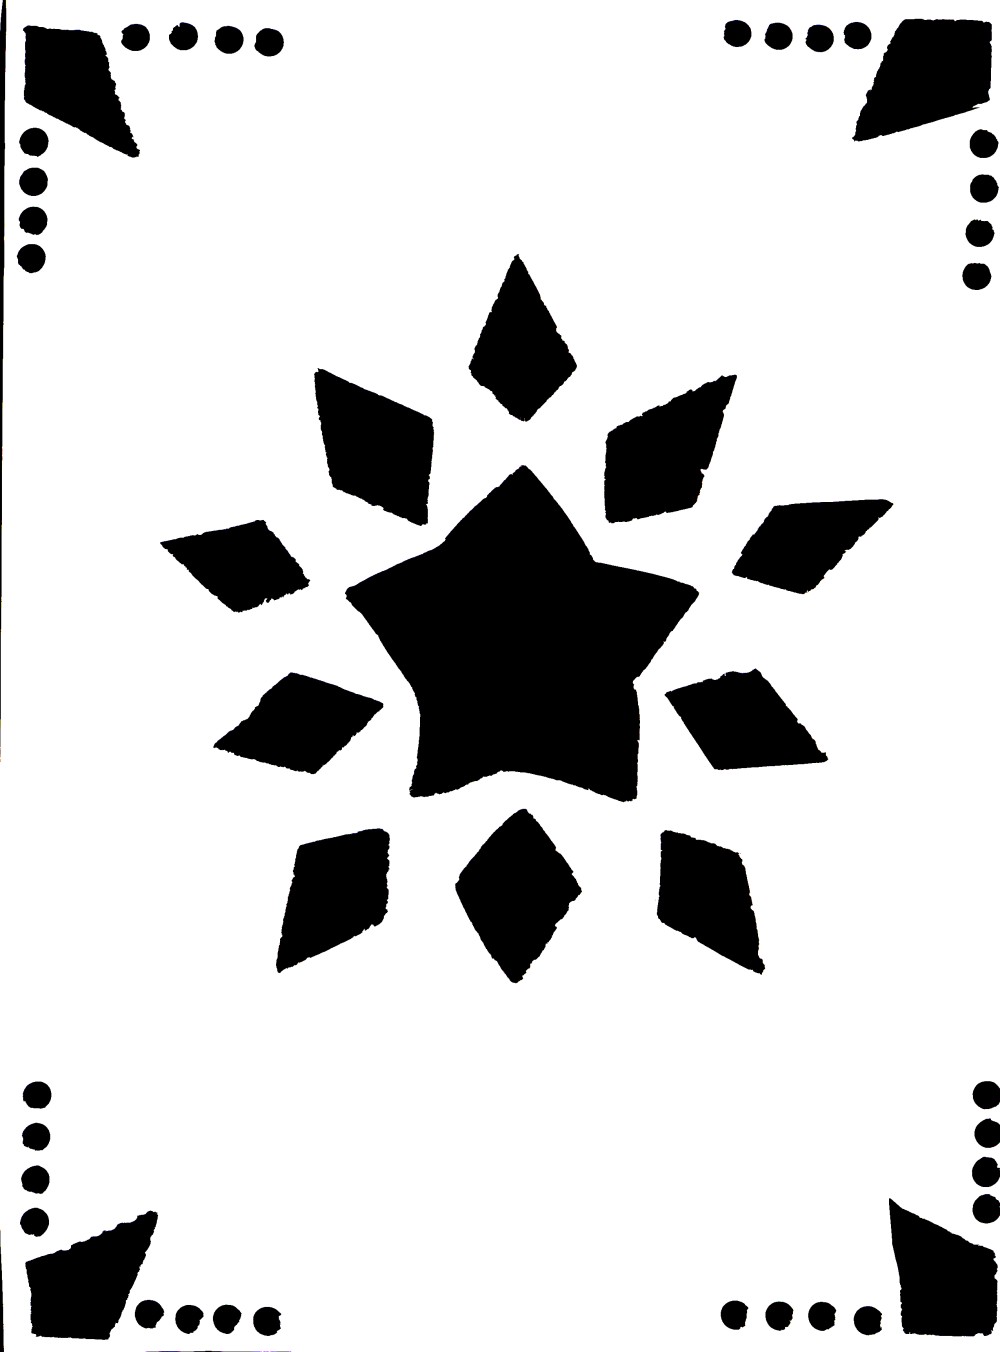
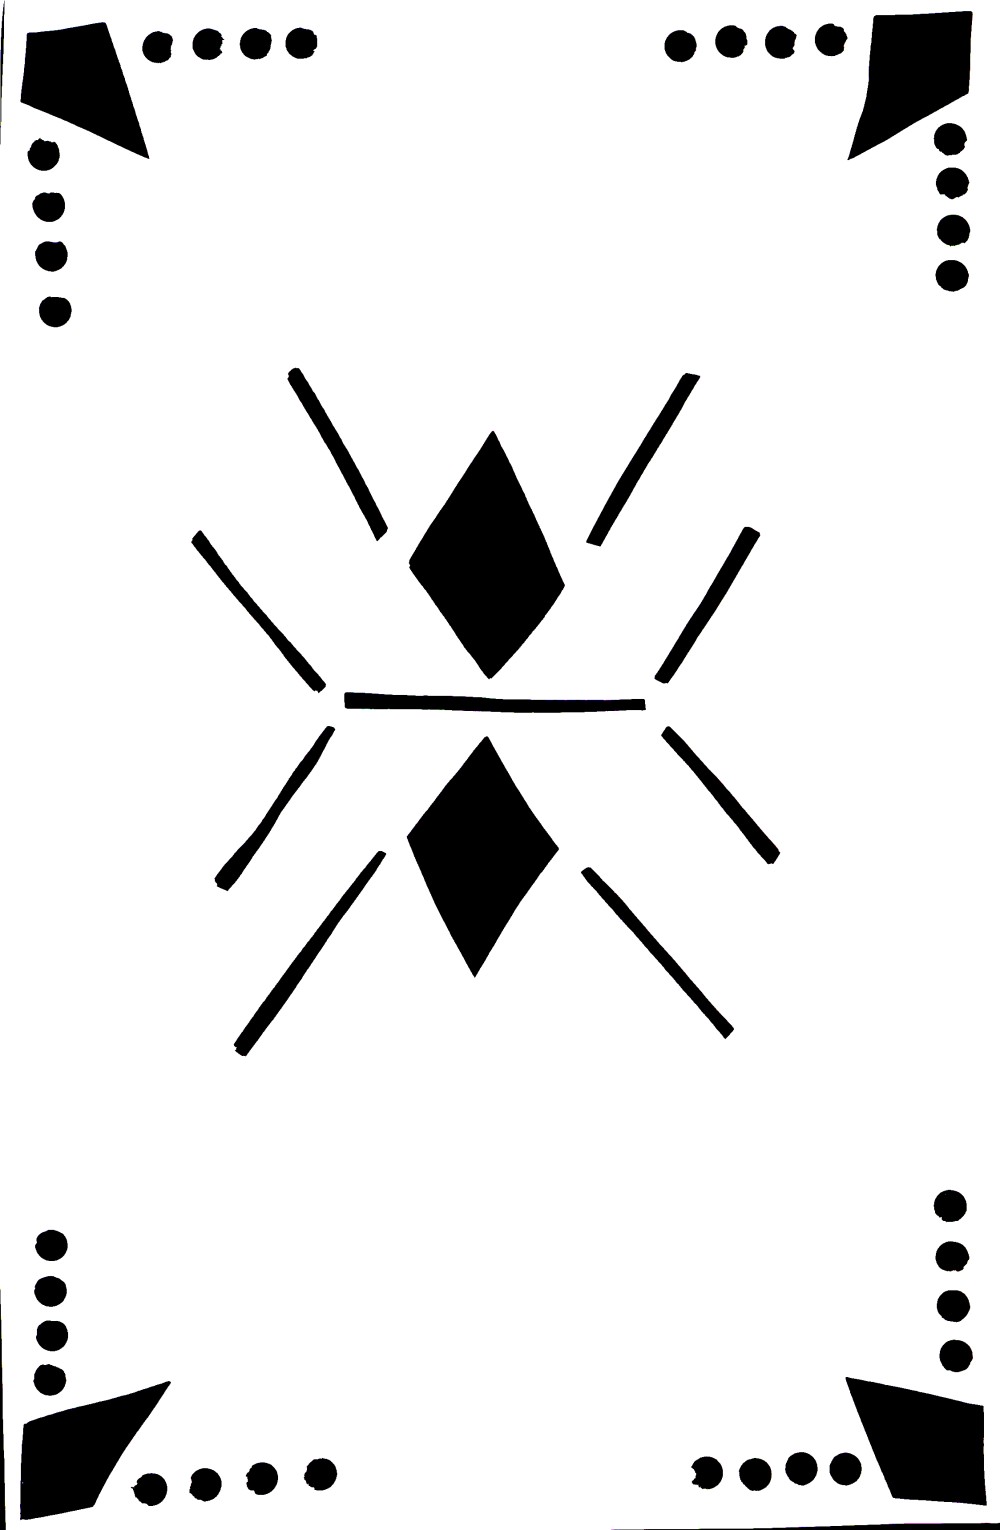
WINDOW PANES OF A HAUNTED COTTAGE
Supplies:
- Pack of black construction paper
- Window pane templates: #1 #2 #3 #4
- Exacto knife
- Scissors
- Measuring tape
- Pencil
- Cutting board
- Double-sided tape
Instructions:
- Measure the window panes, length and width. Count the number of panes per window.
- Look at the templates for the panes. Decide on a layout that fits the entire window. Assign each type template with a letter of the alphabet. On a sheet of paper, create a grid of the layout using the letters to represent the placement of each template type.
- Size the templates to fit the window panes. Create stencils of the templates. Trace them onto the construction paper and then cut them out with the exacto knife.
- Using the grid layout, place the paper panes over the interior panes of the window.
- Using a small amount of double-sided tape, adhere the panes to the window. The light from inside the home will shine through the cut-out images and turn ordinary windows into spooky wonders worthy of a haunted cottage!